Affiliate links are used.

I finally got around to one of my #slackerprojects. Painting my chest. [beat]. Not that kind of chest! My lingerie chest! I originally saw a pin on Pinterest with such a project and knew exactly which piece of furniture would get the treatment. My parents procured this chest for me when I was knee-high to a grasshopper in grade school. With it’s shiny brass hardware and well greased drawers, it grew to a highly useful, visually outdated eyesore as the years went by.

I decided that this project had to get an overhaul. I did not want to sand this puppy down. Too many angles, and with Red running around like a slightly less destructive #frankenstorm, I didn’t have the time or patience. Instead, I procured a bottle of liquid sandpaper (also called deglosser – I like the Rust-Oleum brand if you can get it) and a scrap towel and started rubbing at the wood. (Please note that I did this in our open-doored garage with a fan running and laytex gloves. Deglosser is extremely flammable and noxious). Take a small portion of the toss after you’re done cloth and soak the corner in deglosser. Rub vigorously on the wood to strip the finish and pore the wood. The delglosser is no substitution for sanding (or so the bottle says) but the paint has held up GREAT to the daily drawer slamming.
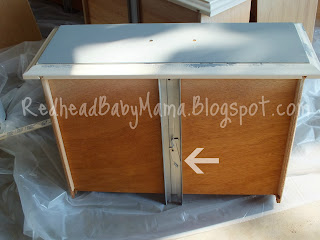
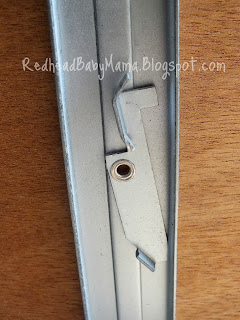
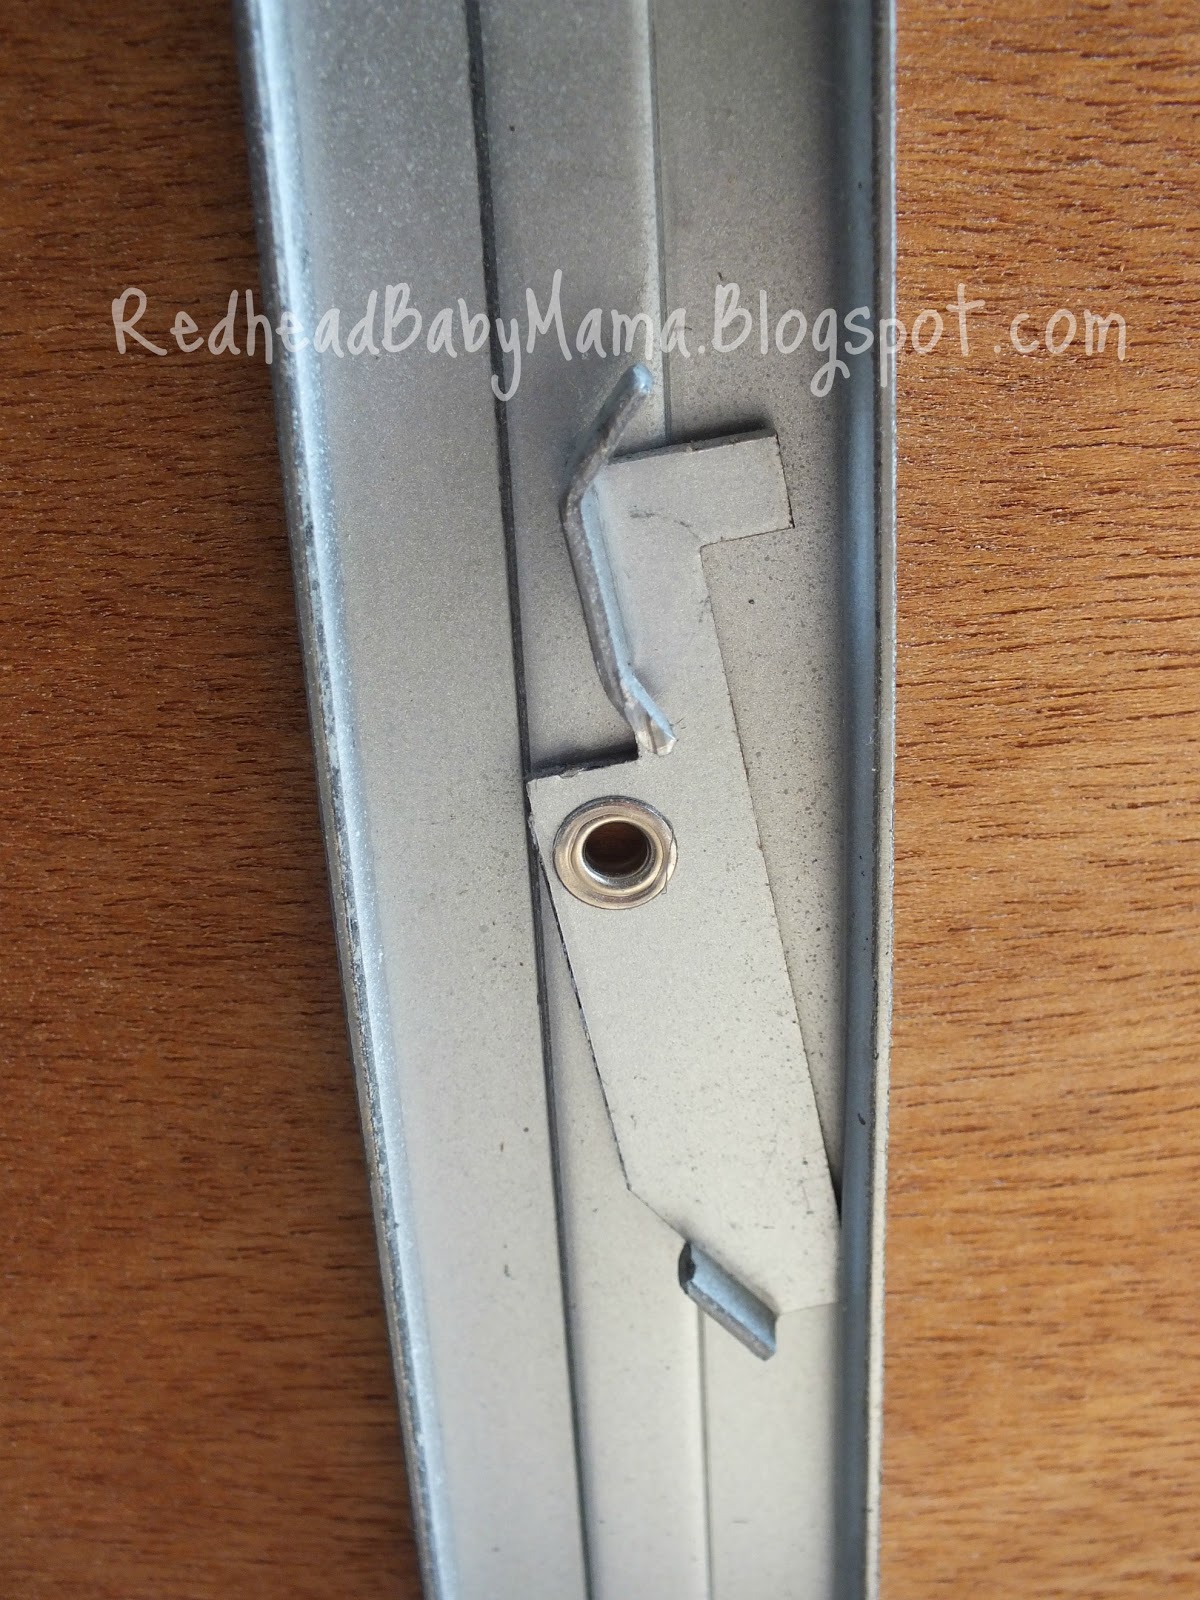
Speaking of drawers, can you not remove your drawers all the way from your chest? Check the underside for a flip switch that will allow the drawer to slide out all the way. I had no idea these existed until 6 months ago. I mean, how often do you look at the underside of a drawer, anyway?!
 Also… if you can’t remove your drawers, your 8th grade underpants may or may not get stuck on a shelf. Just sayin’…

 Also… if you can’t remove your drawers, your 8th grade underpants may or may not get stuck on a shelf. Just sayin’…
After deglossing, it was painting time. The dresser had been white ever since I had owned it, so that meant no primer base coat for me! I took two coats of gray Behr paint and slathered it on the dresser. By the next morning, all surfaces were dry and ready for the new hardware! (Make sure you take measurements before you purchase anything). Back in its own little corner (in its own little chair), the dresser looks great, and it’s much more modern! Now I’m snooping around the house looking for my next deglosser victim! I should mention that this project was hosted on wedgewoodinteriors.com as one of the best lingerie chest makeovers!

Rust-Oleum Zinsser 1-Quart Paint DeglosserRecycled T-Shirt Cloth Rags
Rust Oleum Ultra Cover Spray Paint, Gray Primer

I agree. Hawt.
Absolutely LOVE it!!! Now I want to go paint something!
Love how you referenced roger & Hammerstein and that you showed your results following a pin. Seeing things actually work is heartening.
thank you! I can tell you that the chest is STILL taking a beating and the finish still looks perfect! Let me know if you take the treatment to one of your own pieces!
Getting ready a couple of pieces …sounds like a trade off of sanding dust vs noxious fumes, both messy and requiring a lot of rubbing. Which do you prefer and why?
The newer deglossers had little to no fumes; I just used a new brand (https://amzn.to/2M9VW0s) this weekend and I was so impressed. I used an old dishrag and it took very little rubbing to remove the finish from a table. I had the table cleaned up in less than half the time of sanding, with only a rag to throw away instead of dust. No electricity, no sweeping, and faster!
This information was exactly what I was looking for so I can start re-doing an old dresser into a bright, new dresser/changing table for my grandson! He’s expected August 12th so I’m excited to get started! Thanks!
Thank YOU! I hope it turns out well – our dresser is still looking as good as the day we painted it. Please come back and leave a picture of your finished product – I’d love to see it!
What kind of paint brush did you use?
I used a regular angle brush for laytex on all the angled trim, and a small roller on the flat surfaces to avoid brush lines. Thanks for asking!
I certainly didn’t know about the flip switch.
http://jtrader.hubpages.com/hub/Carters-Keep-Me-Dry-Baby-WaterProof-Fitted-Quilted-Pad-for-Cribs-and-Toddler-Mattress
Good post. I absolutely love this site. Stick with it!
Look into my blog postcardboard boxes,moving boxes
My dresser is older like almost the same style as yours but the top of it appears to have a thin plastic layer on top..is that repaintable as well??
Yes, that would be a layer of Formica. Furniture form the 70s and early 80s often has this coating on top. It unfortunately, requires sanding with an orbital sander, before paint will affix. Then, you will need a coat of poly.
My dresser is very similar to yours but it has what appears to be a thin plastic layer on the top of it, is it re paintable as well? It looks like wood but doesn’t feel like it
I liked before!, but now it’s for an office…depends on the purpose it’s ok.
Thanks for the tip!
I have a question regarding the” blue” wall in your bedroom – what is the name of the color? Love it!
I am looking for this shade of blue.
Thanks.
I actually did some light sanding on a used dresser I purchased & painted it Glidden’s Geranium Red with black hardware. It looks fabulous!! However, the top of the dresser remains a bit sticky. Is there something I can put on it to stop that?
It sounds like you might need a clear top coat. if even that doesn’t work, I would recommend medium-duty sanding, Kilz and another coat of paint. The dresser sounds beautiful.
I was hoping to see the color that was used on the green dresser. That is gorgeous!
which dresser? The tall one as it was finished? It was actually a dark gray color. Thank you for your kind words!
I have a dresser, side table and complete bed to do. The front of the drawers don’t seem to be real wood, but the rest of it is. All the pieces are very sturdy and heavy. Do you think I can to the degloser on the fronts then paint them??
is it laminate? I would kilz the front of those and then paint. Although a coat of deglosser can’t hurt! 🙂
I was looking for something like this. We just bought a new house & got some new furniture, but I wanted repurpose some old pieces we have. This is going to be used on a little bathroom storage cabinet for our powder room! Thanks for the ideas!
You’re welcome! I hope you’ll be happy with how easy the deglosser makes things. 🙂
I was wondering after all these years how your dresser is looking. I’m looking into refinishing a large oak dresser. Would not sanding it work out? I hate to sand it.
The dresser is actually holding up PERFECTLY. I’m proud to say that we open and close these drawer multiple times each day (since they house PJs, workout clothes, underthings, etc) and not a chip on it. I made sure to really de-gloss the heck out of it, and had paint with primer mixed in… you can do it!
Thanks~ Thats a great relief.
Hi! What kind of paint did you use?
It was Behr paint and primer in one… because I’m too lazy to prime! 🙂
Hiya! Your dresser looks beautiful, and I’m glad that it’s still holding up for you! I was wondering about something. When you said that you recommend the Rust-Oleum brand deglosser, were you referring to this stuff here? Any help would be fantastic! Great work on the furniture! 😀
-Jeremy
Oops… I forgot to leave the link in my comment… sorry! Anyway, here it is: http://www.amazon.com/Rust-Oleum-Zinsser-42124-1-Quart-Deglosser/dp/B006ZJHOCC
Anyhoo, if you get the time, I’d love to hear back from you, Lindsey! Thank you so so much! 😀
No worries! Yes, the Zinsser is good stuff! (http://amzn.to/1NLz1nH is my link, if you care to use it!). I’ve also used a couple of store brands that have held up well, too. Let me know how your project ends up! 🙂
Will do! Thank you so much for your help, Lindsey! I feel much more confident in this deglossing thing now! Oh by the way, I have a couple of projects in mind, but whichever one I choose first, if you would like to see the results, I’d be more than happy to show them to you once they’re done! Take care! 🙂
Hey, Lindsay, I have just one more thing to ask: Is there a way for me to contact you (besides this comments section, of course! XD ) if I have a question about something as I progress through my projects? I would greatly value your input and experience! At any rate, let me know when you can! Thanks again! 😀
-Jeremy
But your before and after pictures are not of the same piece of furniture!
I guess that means I did I really good job of transformation! Yes, it is the exact same piece with paint and a new set of handles. If you’re trying to look at the moulding up top, the shadows don’t show as well in gray. But I promise, it’s the same, and the paint is performing perfectly, all these years later! 🙂
Hi im looking to do this to my cot it is choco brown and really would love it to be white could i still use this step
I think so, but you’ll have to snag a paint that either has primer mixed in (behr is a great choice) or prime before you paint. You still won’t have to sand if you choose a good deglosser.
I really want to paint my furniture as its color gets faded more and more but I still don’t know which way is the best to do it! Thanks for sharing the post here!
Was this a solid wood dresser or was this a laminate over particle board?
Thank you for visiting! Yes, the dresser was a solid wood dresser. If you want to paint over laminate, I would recommend a KILZ undercoat for a very adhesive surface. Good luck!